Sutle: DNS, Emails and Twitter Developer Account Application
Part 2 of Building Sutle.
This is part 2 of 3 regarding my experience in building Sutle. If you missed part 1, you can checkout Sutle: The Beginning.
Table of Contents
Buying my first domain, sutle.io.
Configuring the front-end’s domain name in Vercel.
Configuring the back-end’s domain name in Heroku.
Learning ‘bout sending emails.
Twitter developer account application.
Buying my first domain, sutle.io
PS: I said that I’m not going to make this a technical article but this part kinda became like that 😅.
I bought my first domain name, sutle.io, from Namecheap. I only have a GCash Mastercard at that time so I hooked it up with PayPal to make the purchase. I also bought a starter email, hello@sutle.io. I’m not that knowledgeable in DNS, so yah I had to read what those “A Records” mean.
I’m using Vercel for deploying my front-end app then Heroku for my API server. To add the custom domain names, I configured the A Record and CNAME of those.
A Canonical Name record is a type of resource record in the Domain Name System that maps one domain name to another.
An A record maps a domain name to the IP address (Version 4) of the computer hosting the domain.
— DNSimple
In short, A Record points to an IP while the CNAME points to another domain name.
With that, I was planning to map the app’s domain names to my custom ones:
A Record - 76.76.21.21 (vercel) to sutle.io
CNAME - sutle-api.herokuapp.com to api.sutle.io
Configuring the front-end’s domain name in Vercel.
So on Vercel, I went to my Sutle project then went to Settings. Then under Domains, I’ve added sutle.io. With that, Vercel will show how to configure the domain, you can do it by using an “A Record” or “Nameservers”. In this case, I’m using A Records.
Following this, my configuration on Namecheap under the domain’s Advanced DNS settings has become:
The “@” actually refers to the “root” of the domain name which in this case it’s sutle.io. I also added “dev” and “www” subdomains.
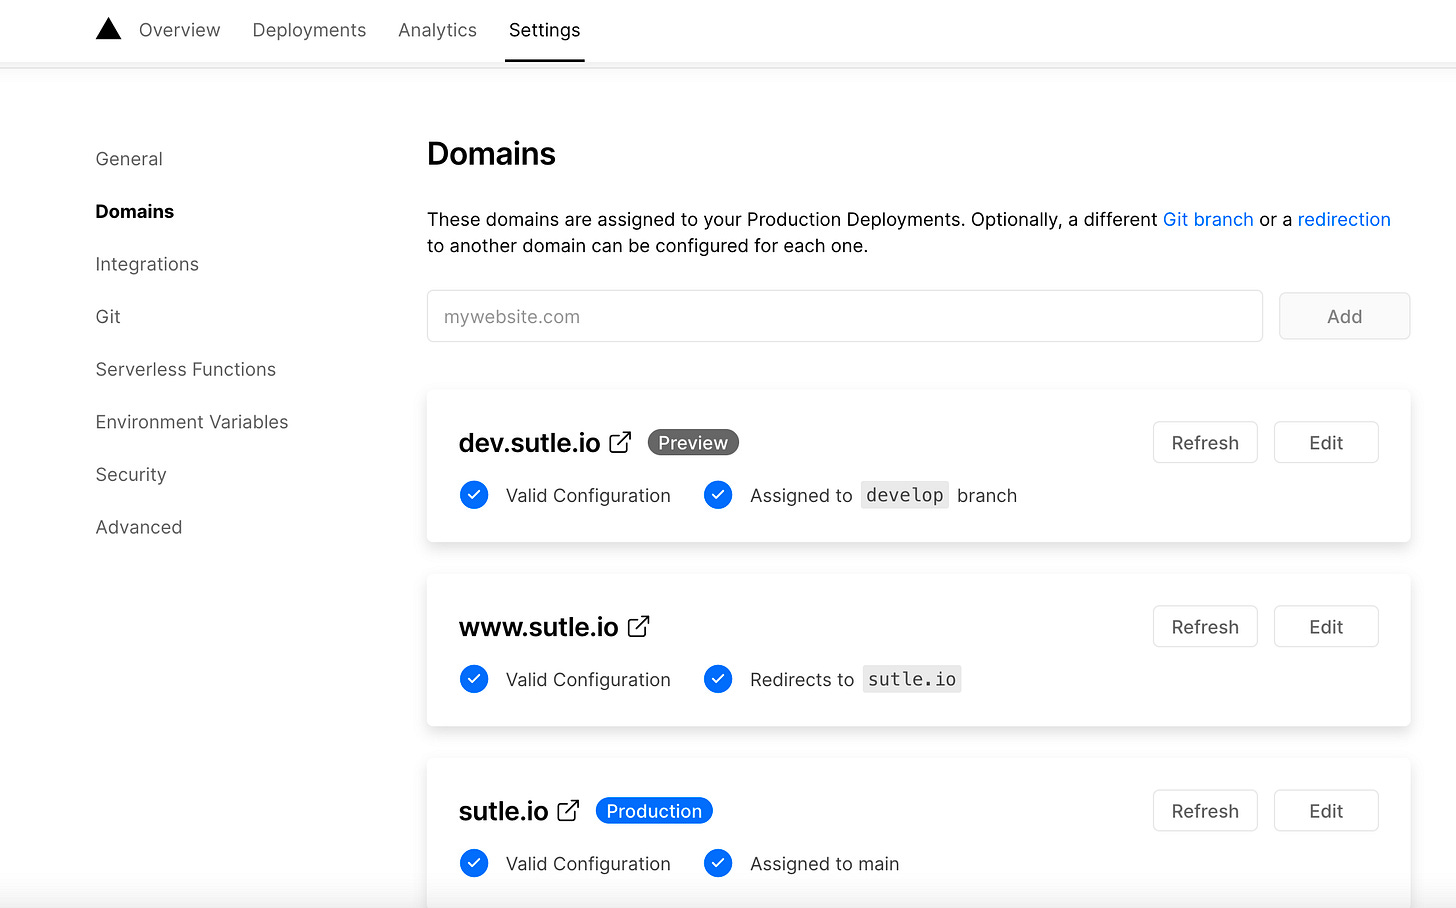
dev.sutle.io became the development version of Sutle. I use it for testing new features and bug fix before deploying it to production for all to see. It uses the “develop” git branch.
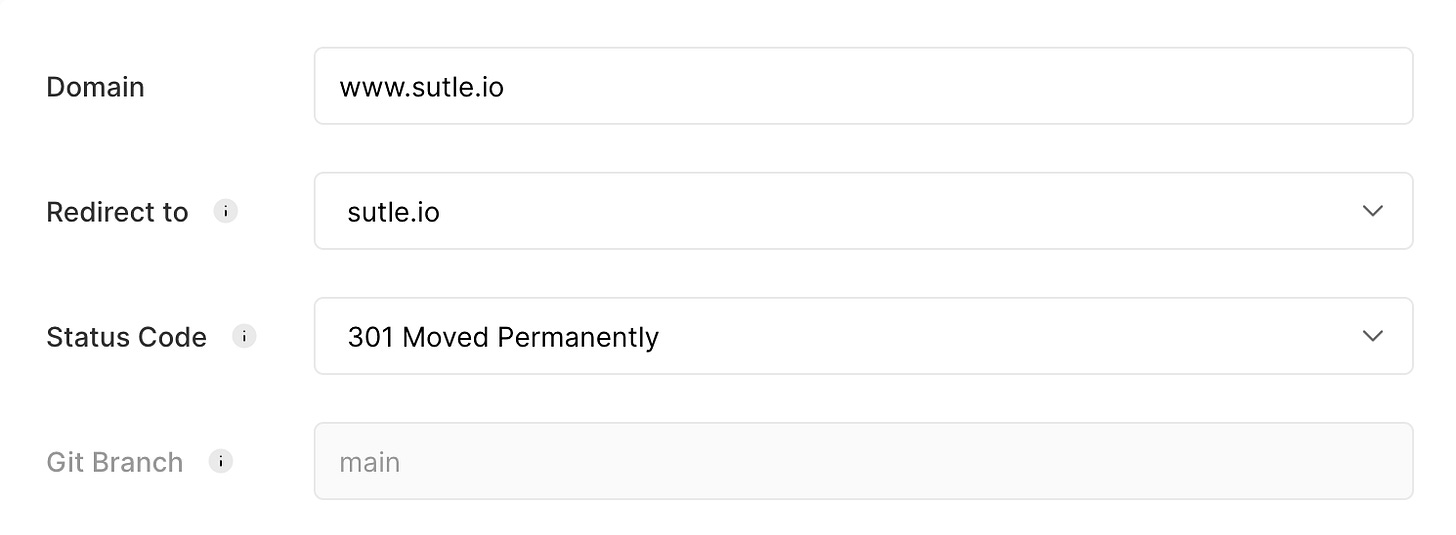
Meanwhile www.sutle.io just redirects to sutle.io.
So for the Namecheap configuration, it became like this:
Configuring the back-end’s domain name in Heroku.
As for my API server, I’ve added a custom domain in Heroku by going to my project’s Domains under Settings.
I took the DNS Target of api.sutle.io. Then added it as a CNAME in Namecheap.
Then that’s it!
I tried adding custom domains before in a PHP web app using 000webhost (Note: don’t use this for serious/commercial apps). I wrote about it in an article I wrote back then entitled “6 Ways to Deploy your Personal Websites / PHP+ MySQL Web Apps for Free”. But I didn’t really get DNS that much. I guess experiencing setting up the custom domain name for Sutle helped a lot. Buuuut I still got a lot to learn.
Learning ‘bout sending emails.
After configuring the domain names, I tried setting up the emails. I first started with Nodemailer. It was easy to use and I tried creating an email template using TailwindCSS. I created the template on CodePen then converted the class names to inline styles kinda like this:

Unfortunately, I ran into issues when I deployed it. Generating and sending emails causes the server to timeout so I had to make it a background job using Bull.
Sadly, it seems that Nodemailer doesn’t work. It works locally but it doesn’t send those emails on production. I don’t know what configuration I did wrong. Anyways, I decided to redo the email with Mailgun. At first, I got confused as to how it worked. But after looking at the examples especially the cURL one, I manage to make it work. So with that, I now use Mailgun in which I availed from my GitHub Student Developer Pack which will expire this Aug 2021.
As to how I used Mailgun, under Sending -> Domains, I’ve added sutle.io.
When you added the domain, it will show you how to configure the email either by API or SMTP.
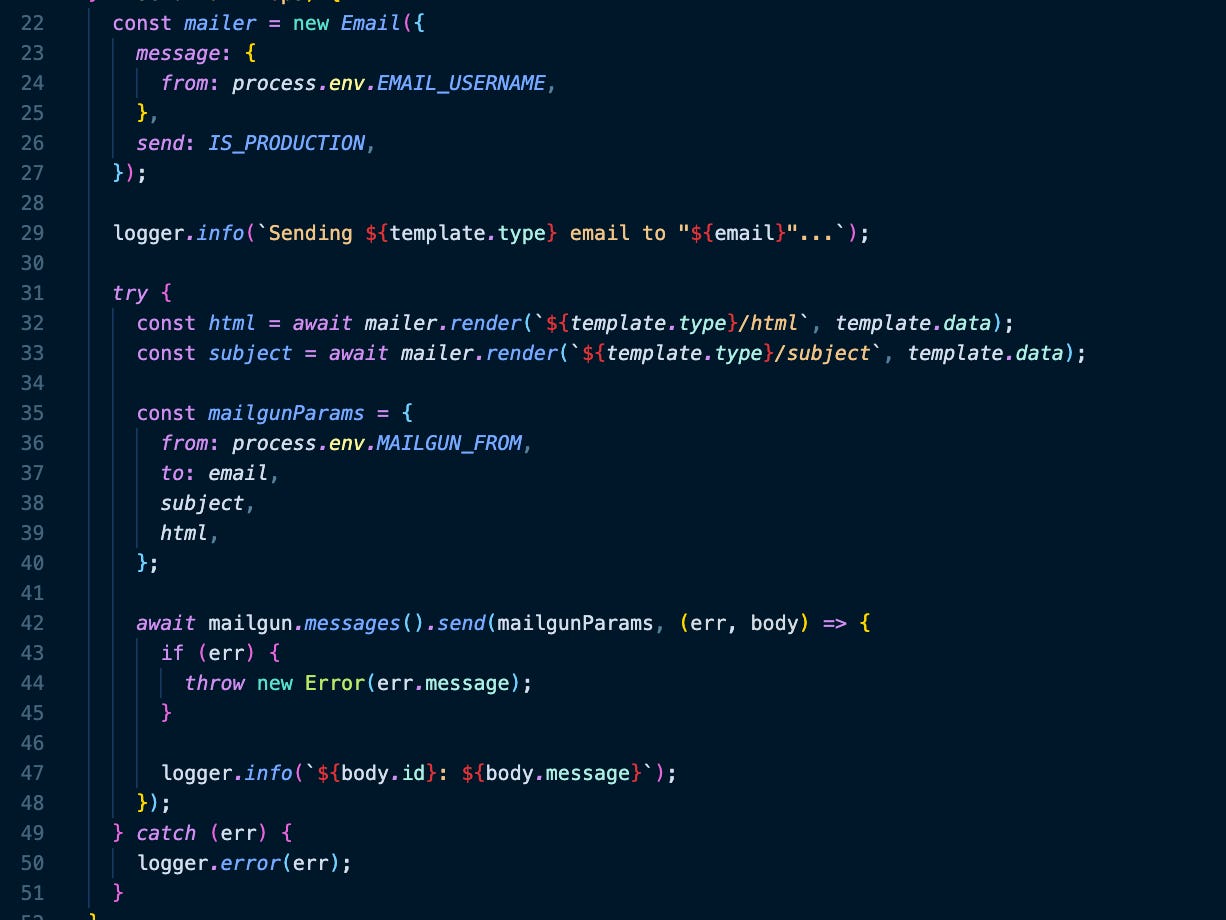
With that, using email-templates for creating an email and Mailgun, my code became like this:

Tho I will not really dig deep into this cause this is not a tutorial lol. To end, I managed to setup Mailgun for sending emails.
Twitter developer account application.
I wanted to add “makers” to the resources added into the learning paths via Twitter API kinda like how Product Hunt does it. So with that, I decided to apply for one.
My first submission was kinda informal 😅 Thankfully, they didn’t disapproved it outright and said that I need to give more information regarding my usage of it. So with that, I decided to get serious and wrote this:
By the end of the day, my application got approved! With that, I was able to finish the makers part of learning path’s items.
Ending Note.
Thank you for reading this post!
Sneak peak of part 3 entitled Sutle: Launching on Product Hunt:
Working on “resources”.
Alpha release on Product Hunt.
Till next time ciao!


